

MY TOOLSHED
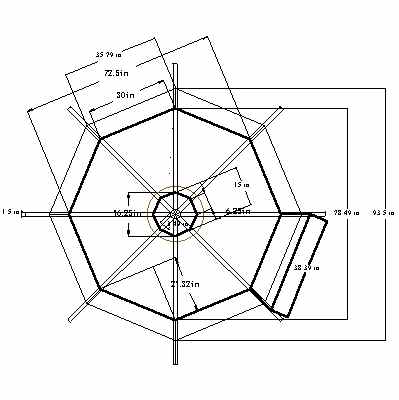
Several years ago my wife and I were able to purchase the lot next door. In the time since, we have fenced it in, added a koi water garden, and many flowers and shrubs. In all that time, however, we never had any place to keep tools (shovels, rakes, etc.) on the lot and spent much time walking back and forth from our house lot with them. Karen suggested many times that I should build a shed for tools on the "new" lot. The following visualization began in the back of my foggy mind:
 This proceeded to:
 and:
and:
 and:
and:
 and:
and:
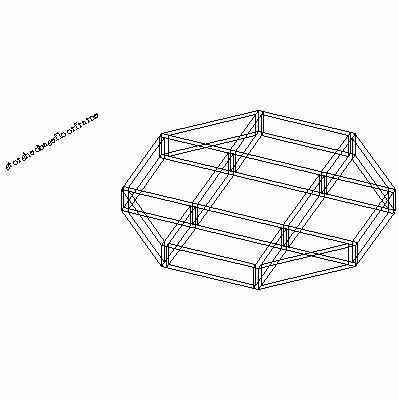
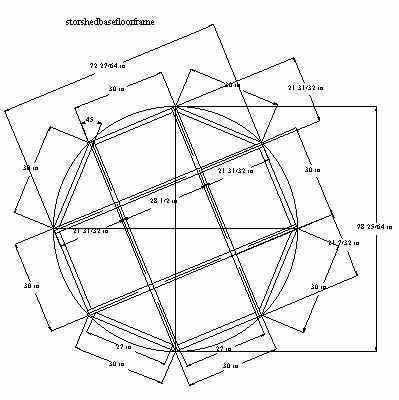
 I started by building the base frame first in the carport, then rolling it to the site and using the actual floor frame as a locating system for the support pillars. After digging the holes for the support pillars, I made tubes out of roofing felt, added reinforcing wire, and poured the pillars in two stages.
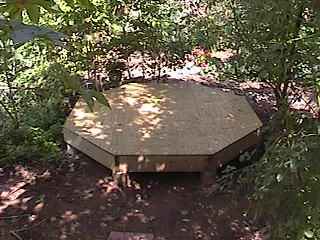
 The first stage was to anchor the tubes and pillars in place. After that had set up, I positioned the floor frame over the tubes and extended the "J" bolts through the frame and into the tubes. I then filled the tubes with concrete. The next day, I tightened the "J" bolt nuts and installed the floor. At this point, the project looked like this:
Here is a shot of the underside, showing how the beams interlock.
 This picture shows the "crown" installed on the top of the studs.
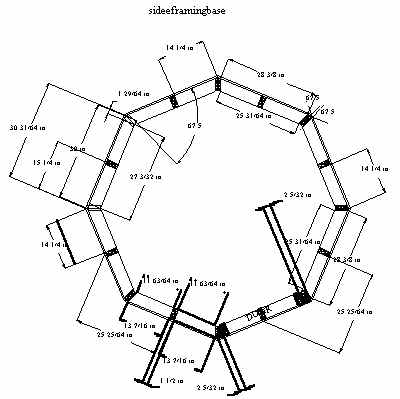
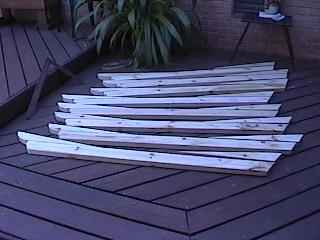
 Here are the rafters, assembled with three pieces each, to give the roof a curved effect.
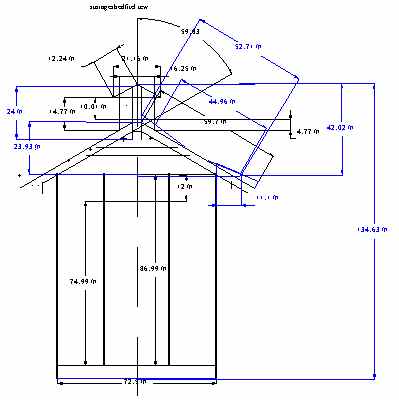
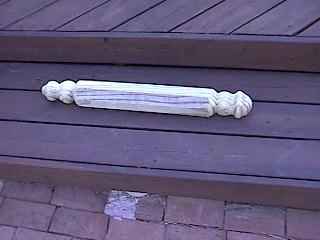
 I turned this piece from a treated 4x4 that I had cut so that it had 8 equal sides. It is the roof center post.
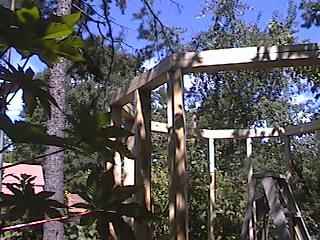
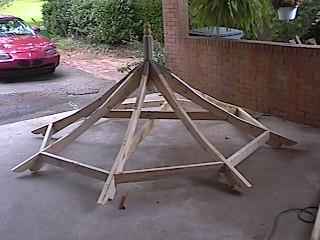
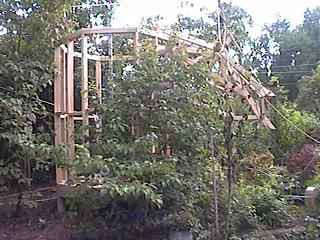
 Because I am old and infirm, I had to construct the roof frame in my carport. you can see the roof center post extending up in the middle. I built a cupola ventilator to fit over the post.
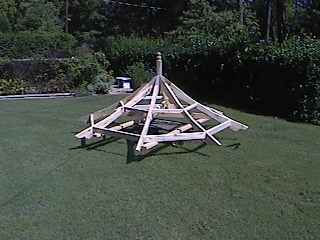
 After construction, the roof frame had to be moved next door.
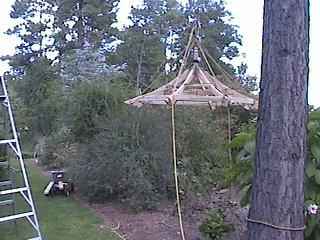
 I hooked up some ropes in trees and hoisted the roof frame, which weighed over a hundred pounds up into the air.
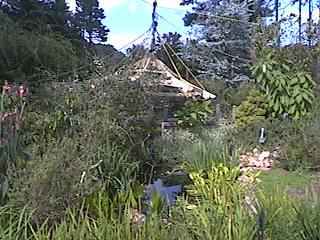
 Here is the roof frame traversing over the koi pond. The fish seemed unconcerned.
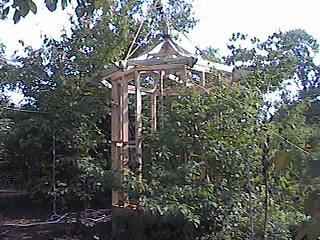
 Upon arriving at it's destination, the roof frame had to be hoisted up high enough to climb over the toolshed framework.
 Lowering down the roof frame and "marrying" it to the shed frame.
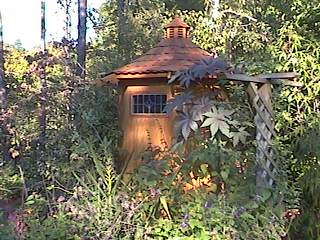
 Here is the finished project. I had an antique stained glass window left over from a years ago project and decided to use it in the toolshed.
This shed is entirely of my own design. If you are interested in building a similar shed, I can send you copies of my plans for $10, which will basically cover my printing and mailing costs. Understand that the plans are not 100% detailed, but will include some pictures not shown above of pertinent construction details.
Last modified on October 9, 2000